Running Your Android Application on an Android Emulator
After you create one or more Android emulators, you can run your RAD Studio mobile applications on your Android emulators. Before you run your application on your Android emulator, start your Android emulator as described below in To Start Your Android Emulator, so as to reduce startup time when you run your Android application from the IDE.
-
 Caution: Android emulators are extremely slow and do not support the same feature set as real devices.
We do not recommend that you attempt to use an Android emulator:- If you have an Android device, use your Android device instead.
- You can also use Mobile Preview to do initial debugging of an Android app.
- The default installed location of the Android development tools is:
-
C:\Users\Public\Documents\Embarcadero\Studio\14.0\PlatformSDKs\adt-bundle-windows-x86-20131030\sdk\tools
-
To Start Your Android Emulator
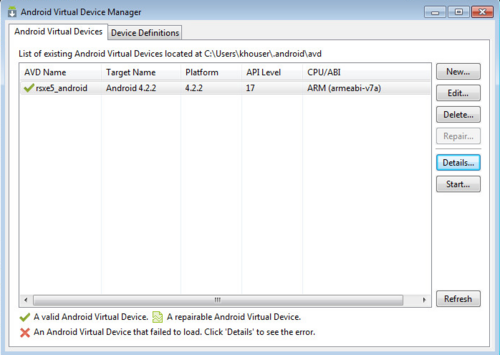
- Start the Android Virtual Device Manager: Select Start | All Programs | Embarcadero RAD Studio XE6 | Android SDKs | Android AVD Manager.
- In the Android Virtual Device Manager, select your Android emulator in the list and click Start.
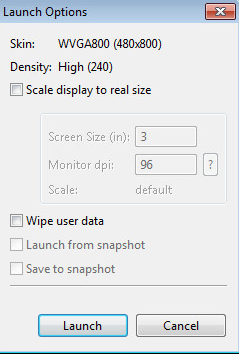
- On the Launch options dialog box, click Launch:
To Run Your Application on Your Android Emulator
- Open your Android application in RAD Studio.
- In the Project Manager, enable the emulator as the target platform.
- If necessary, expand the Target Platforms node and double-click the Android target platform. (The active target platform is displayed using a bold font.)
- Expand the Android node in the Project Manager.
- Expand the child Target node.
- Double-click the target Android emulator to activate it. (The active emulator is displayed using a bold font.)
- Note: If the emulator is not shown, right-click the Target node and select Refresh. If the emulator still is not displayed, see Using the Target Node.
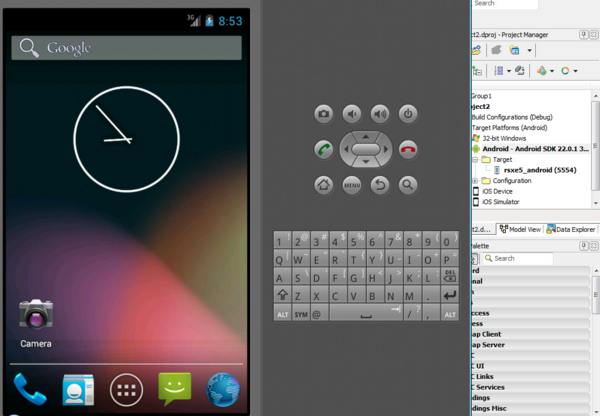
- In the following image you can see an emulator named rsxe6_android running, and the target platform setting activated in the Project Manager:
-
- In the device selector in the FireMonkey Mobile Form Designer, select the device that matches the emulator you are using. For example, if your emulator uses the WQVGA400 device, select 3.3" WQVGA Android Phone (240dp x 400 dp).
- Run your application:
- Run with debugging (Run > Run or F9)
- Run without debugging (Run > Run Without Debugging or SHIFT+CTRL+F9)
- Compile and deploy messages should appear in the IDE.
- If the emulator is not running, the IDE displays: "The selected emulator is not running. Do you want start it?" Click Yes. A "Launching emulator" message is displayed.
- Open your emulator screen and watch for the app to appear.
- In the following image you can see a custom Nexus 4 emulator running a simple Hello World! application:
-
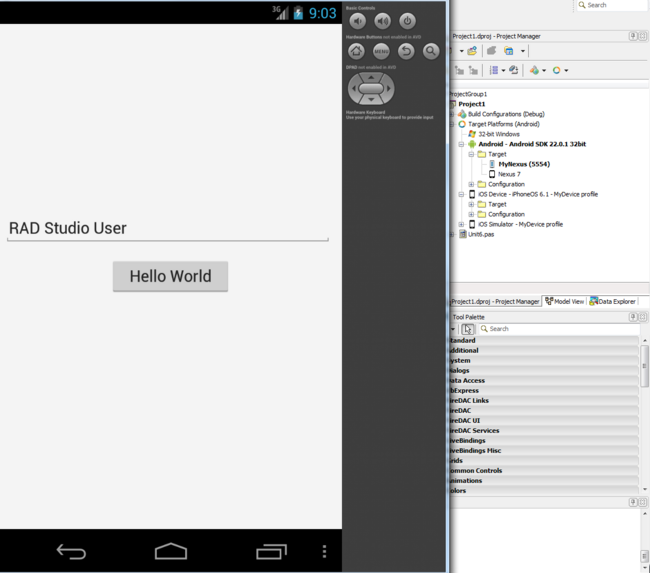
RAD Studio builds your application for Android and runs your application on the selected Android emulator. If the active Android emulator is not running, RAD Studio shows a dialog box that gives you the choice to start your Android emulator. If your Android emulator screen is locked, unlock it to access your application.
Android emulators run much slower than real devices due to the ARM platform emulation on top of a non-ARM system; if performance prevents you from using an Android emulator side by side with RAD Studio, see Running and Debugging Your Android Application Remotely. For obvious reasons, emulators also lack some of the physical features that real devices provide, although you can emulate some features], such as geo location.