Running Your Android Application on an Android Device
After you prepare your development system for Android development, enable USB debugging in your Android device and configure your system to detect your Android device, you can run a FireMonkey mobile application on a connected Android device.
- Connect your Android device to your development system using your device's USB cable.
- You should see your Android device listed under Portable Devices in the Device Manager (available from the Control Panel).
- For more information, see Configuring Your System to Detect Your Android Device.
- In RAD Studio, select File > New > FireMonkey Mobile Application - Delphi.
- In the Project Manager, activate (double-click) the Android target platform.
- Enable the Android SDK for your device:
- In the Project Manager, right-click the Android node and select Properties.
- In Platform Properties, click the down-arrow in the SDK (Software Development Kit) field and select either:
- Your installed Android SDK version, if it is displayed
- Add New
- In the Add a New SDK dialog box, click the down-arrow in the Select an SDK version field and select your installed Android SDK.
- Complete the fields in the Create a New Android SDK wizard. Most of the fields are completed automatically by the wizard.
- Enable your Android device as the target platform: In the Android target platform in the Project Manager, open the Target node and double-click your Android device.
- When your Android device is correctly installed, the SDK version number appears after the Android target name; for example, Android - Android SDK 22.0.1.
- Tips: If your device is not shown, try these steps:
- In the IDE, right-click the Target node and select Refresh.
- In the Control Panel, open the Device Manager:
- Verify that your Android device is listed, typically under Portable Devices.
- If your device is not listed, right-click any node and select Scan for hardware changes.
- If necessary, use the Android SDK Manager to uninstall and then reinstall the device driver for your Android device. Select Start | All Programs | Embarcadero RAD Studio | Android Tools.
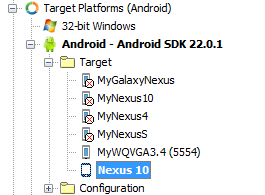
- The following image shows a populated Android Target node displaying the Nexus 10 device, one emulator that is running, and several emulators that are not running:
- Run your application:
- Run with debugging (Run > Run or
F9) - Run without debugging (Run > Run Without Debugging or
Shift+Ctrl+F9).
- Run with debugging (Run > Run or
RAD Studio builds your application for Android and runs your application on the selected Android device. If your Android device screen is locked, unlock it to access your application.
Troubleshooting
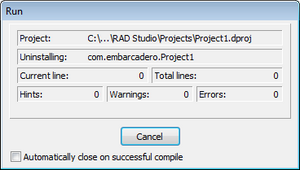
Stuck at "Uninstalling" on the Run Dialog Box
You might need to enable USB debugging specifically for your computer if you are running Android 4.2.2 or later and when you click Run or Run Without Debug, RAD Studio does not go beyond the following screen:
You might also need to enable the general USB debugging setting in your device. If this is the case, your device should show a dialog box asking you to allow USB debugging:
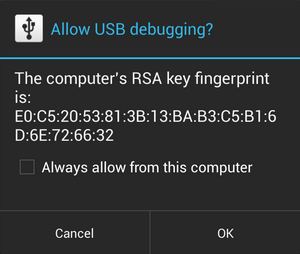
Click OK to allow USB debugging.
If you accidentally click Cancel, disconnect your device from your PC and then reconnect it to make the dialog box reappear on your device.